Making your own cosmetics at home is easier than you think! You can whip up some beautiful homemade products in your kitchen with simple ingredients.
From face masks to lip balms and everything in between, these easy recipes will have you looking gorgeous in no time. And the best part? You can tailor them to suit your individual needs and preferences!
So, read all my top tips on creating DIY cosmetics from home.
Preparing The Necessary Tools
You first need to gather all of your ingredients together, so look around your kitchen and ensure you have everything you need. Next, you’ll want to ensure you have the right measuring tools so your recipes come out the way they should. Finally, have a few containers for storing your homemade cosmetics when you’re all done.
Gathering Ingredients
Gathering the ingredients for homemade cosmetics is a lot of fun! It’s always exciting to see what you can find in your kitchen and how it can be used to make something special.
Olive oil, sugar, and other natural items are all staples when making things like face masks or body scrubs – so grab those before starting any project. And don’t forget about essentials such as measuring spoons and bowls – these will help ensure you get the right amount of each ingredient.
I highly recommend always having some basic supplies on hand; that way, you’re never caught off guard if inspiration strikes! So let’s prepare to craft some amazing beauty products from scratch – it’ll be an adventure unlike anything else!
Measuring Tools
When making cosmetics at home, measuring tools are a must!
Measuring spoons and bowls can help you get the right amount of each ingredient – like olive oil or raw honey. Without them, it’s all too easy to overdo one item or skip out on another entirely.
Plus, they’re great for tracking how much of an individual product is used in a recipe. So make sure to have these items handy when crafting any beauty products from scratch – you won’t regret it!
Storing Containers
Once you’ve got all the necessary measuring tools, it’s time to think about what containers you’ll use for storing your creations.
You want something that seals tight and is easy to label, so if you make a few batches of product with different ingredients or ratios, you can tell them apart easily.
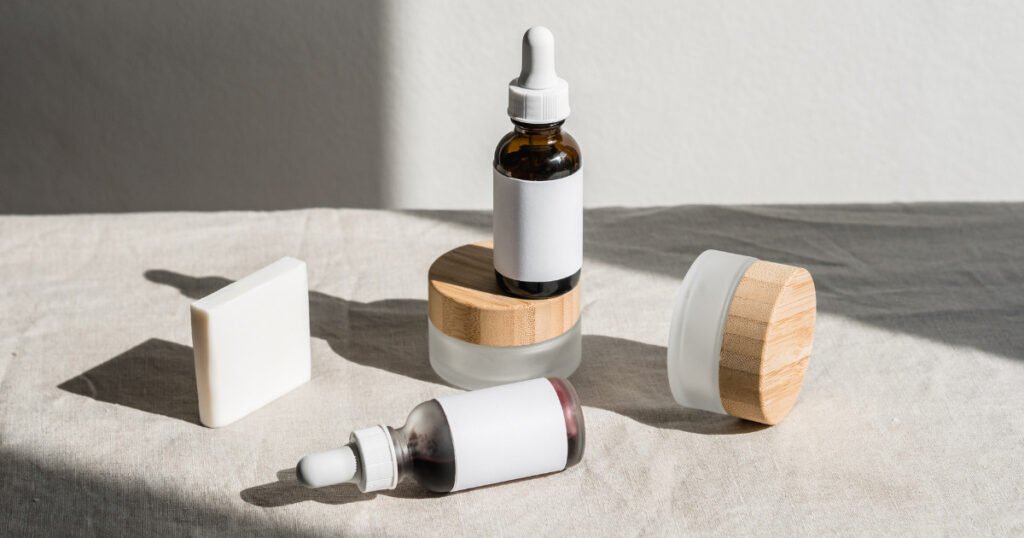
Containers made from glass are best as they won’t react with any of the materials in the cosmetics and will look nice on display.
Make sure to grab extra bottles, too – once friends get wind of your DIY beauty projects, they will ask for some!
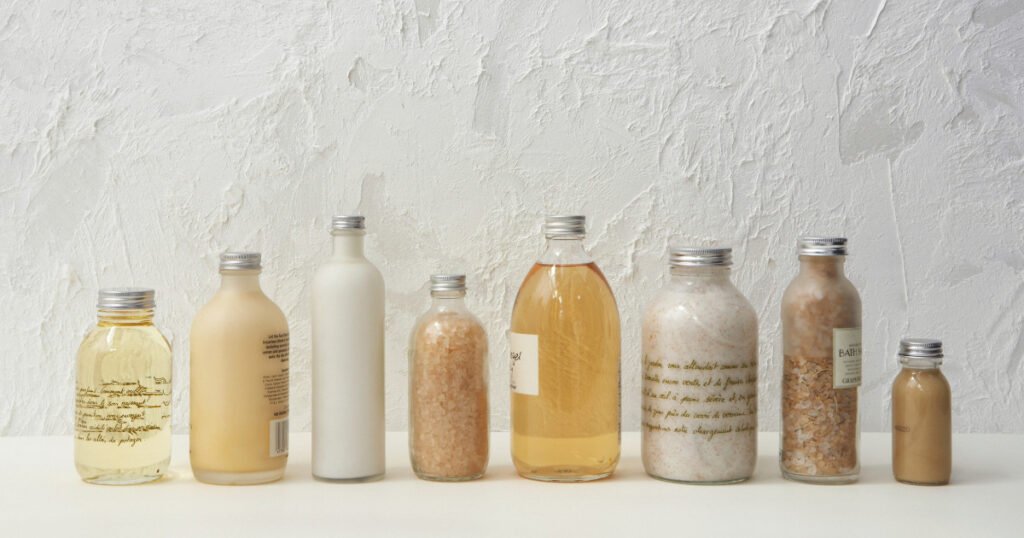
Crafting Bath Salts
Let’s get started crafting some bath salts! First, let’s discuss what ingredients we’ll need and what benefits they can offer.
Ingredients
Greetings, DIY cosmetics enthusiasts!
Nothing is more satisfying than creating something from the comfort of your kitchen. Crafting bath salts with natural ingredients can be easy and fun, plus you get to pamper yourself when it’s done!
Preparing an all-natural blend for a relaxing soak requires combining simple components like coconut oil, Epsom salt, baking soda, honey, and essential oils. Coconut oil is an excellent skin moisturizer; honey adds sweetness and nourishment.
So what are you waiting for? Gather these items, and start crafting our homemade bath salts!
Benefits
It’s time to discuss the benefits of crafting your bath salts!
Firstly, you get to know exactly what goes into them. Using coconut oil and other natural ingredients ensures your skin is nourished without harsh chemicals or dyes. You can customize your blend accordingly if you’re concerned about allergies or sensitivity.
Not only does this give you peace of mind, but it also gives you full control over which essential oils and scents are used in your mix. So why not take advantage of this opportunity to create something unique and tailored to suit you?
Let’s start crafting our homemade bath salts!
Diy Clay Face Mask
It’s easy to make your own clay face mask with just a few ingredients from your kitchen! Clay masks have great benefits, so let’s discuss the best ingredients and advantages.
Ingredients For Clay Face Mask
Regarding DIY clay face masks, you don’t have to look far for natural ingredients – you can find them right in your kitchen!
A simple mix of bentonite clay, honey, and yogurt make a great foundation for the perfect clay face mask. Adding other natural ingredients like oats, apple cider vinegar, or coconut oil will help enhance the benefits of this detoxifying mask.
Plus, these ingredients are easy to obtain and won’t cost you an arm and a leg – that’s why I always recommend making your own clay face masks at home with natural ingredients whenever possible.
Remember to follow safety procedures when handling raw food products and thoroughly wash everything afterward.
With just a few minutes of prep time, you’re on your way to creating beautiful skin with a homemade clay face mask!
Benefits Of Clay Face Mask
One of the best things about using a clay face mask is it’s packed with benefits for your skin!
Clay masks can help reduce inflammation, unclog pores, and absorb excess oil – all while adding moisture to keep your skin healthy.
Plus, they’re incredibly easy to make at home. Mix bentonite clay, honey, and yogurt together and have an instant facial mask.
For nourishment, you can add other natural ingredients like oats, apple cider vinegar, or coconut oil to your DIY clay face mask.
Who knew making a facial mask could be so simple?
So why not try it – you’ll love how soft and glowing your skin looks after just one use!
Creating A Skin-Healing Serum
Gathering the right ingredients for your serum is key, so let’s start there! Making the serum is simple. Just follow the steps, and you’ll be good to go!
Gathering Ingredients
Gathering the ingredients for a skin-healing serum doesn’t have to be complicated or expensive.
You’ll need just two items from your kitchen: brown sugar and vinegar.
Brown sugar is an excellent exfoliator, removing dead cells that can block pores. Plus, it’s natural, so you won’t use harsh chemicals on your skin.
Vinegar has antiseptic properties, making it ideal for acne-prone skin since it helps keep bacteria away.
So don’t fear – gathering these simple ingredients will help you create a powerful healing serum in no time!
Making The Serum
Now that you’ve gathered your ingredients, it’s time to make the serum!
Start by combining equal brown sugar and vinegar in a small bowl. Then add one teaspoon of jojoba oil and two egg whites. Mix everything together until you have a paste-like consistency. You may need to adjust the measurements depending on how much coverage you want from your serum.
Finally, apply this mixture to your face for 10 minutes before rinsing with warm water.
This homemade skin-healing serum will help keep your skin looking healthy and radiant!
Enriching Your Bath With Activated Carbon
Activated carbon is a great ingredient for creating homemade cosmetics, and it has some amazing benefits when added to your bath. I’ll show you how to use it and share some amazing DIY recipes for making your activated carbon bath. Plus, you’ll find all the ingredients for these recipes right in your kitchen!
Benefits Of Activated Carbon
Activated carbon is perfect if you’re looking for an easy and natural way to reinvigorate your bath!
Not only does it draw out dirt and toxins from your skin, but it can also reduce inflammation and redness.
Combined with cocoa butter or tea tree oil – two wonderful ingredients that already boast amazing healing and moisturizing properties – this simple combination becomes a powerful beauty treatment!
So why not give activated carbon a try today?
You’ll be amazed at the results!
How To Use Activated Carbon In Bath
Using activated carbon in your bath is surprisingly simple!
Mix 1/2 cup of crushed activated carbon with 3 tablespoons of body oil and a tablespoon of apple cider vinegar.
This combination will create an aromatic mixture to add to your next bath.
Once dissolved in warm water, it’ll help remove dirt or toxins from your skin while promoting inflammation-reducing effects.
After soaking for 20 minutes, rinse off and enjoy the revitalizing feeling!
And don’t forget to moisturize afterward – you’ll be glad you did when you feel how soft and smooth your skin has become.
So why not give this easy beauty treatment a try? You won’t regret it!
Diy Activated Carbon Bath Recipes
If you want to take your activated carbon bath routine further, why not make DIY recipes? It’s easier than you think!
Start by taking 1/2 cup of activated carbon and mixing it with 3 tablespoons of body oil. Once combined, add some essential oils like lavender or chamomile for an extra relaxing experience.
You can also use a spray bottle filled with apple cider vinegar and water to help the mixture spread evenly when added to your bathwater. Finally, don’t forget to apply a moisturizer afterward – this will keep your skin feeling soft and smooth long after you’ve enjoyed the beneficial effects of an activated carbon bath.
Making A Day Face Cream
I will discuss the ingredients, preparation, and uses of a day’s face cream. To make the cream, you’ll need some basic ingredients that you can find in your kitchen – like coconut oil and essential oils. Preparing the cream is easy – just melt the coconut oil, mix in the essential oils, and stir until everything is blended! Once you’ve got your cream, you can moisturize and protect your skin from the sun’s rays.
Ingredients
When it comes to making your own day face cream, the ingredients are key. You’ll want to use some of nature’s best offerings, like jojoba oil and shea butter, which nourish your body while hydrating and soothing dry skin. Additionally, you can mix in honey or aloe vera gel for extra moisturizing effects.
Adding some drops of essential oils like rosemary or lavender to make this cream your own for a light scent! With these easy-to-find items in your kitchen cupboard and fridge, you can whip up a luxurious facial moisturizer that will refresh your skin all day.
No need for expensive store-bought creams when you can make one yourself!
Preparation
Now that you have all the needed ingredients, it’s time to prepare your daily face cream.
First, use warm water to help your ingredients bind better and create a smoother consistency.
Then scoop out portions of each ingredient into glass containers for precision measuring.
Once everything is combined, give it one last stir with a spoon until creamy and ready to apply!
With these simple steps, you can quickly whip up your custom-made facial moisturizer.
Uses
Now that you’ve got your own custom-made day face cream, it’s time to incorporate it into your beauty routine.
This unique facial moisturizer is an easy and affordable way to add extra hydration and nourishment to your skin care products without spending a fortune!
It can be used often – in the morning before makeup application or at night when cleansing for maximum effect.
This DIY cream can be easily adapted with different ingredients depending on your skin needs, too, so feel free to experiment until you find something that works best for you.
With this simple recipe, you’ll surely have glowing skin in no time!
Creating A Night Face Cream
Let’s get started prepping our ingredients for a nourishing night cream! Next, we’ll mix and blend them to create a luxurious texture. Finally, we’ll apply it to our face and store it in a cool, dark place.
Preparing Ingredients
When it comes to beauty, the most simple ingredients found in your kitchen can be used to create a luxurious night face cream.
Preparing these ingredients is easy and fun!
Gather some organic oats, almonds, honey, and coconut oil – all items you likely already have in your pantry – and place them into a blender or food processor.
Blend everything together until you’ve created a thick paste-like consistency.
Once done, you’ll have an amazing homemade facial cream that will leave your skin feeling fabulous!
So don’t wait any longer; start creating beautiful cosmetics from your kitchen today!
Mixing And Blending
Now that you’ve gathered your ingredients let’s discuss how to mix and blend them.
It’s important to get the consistency right if it works for dry skin!
Start with a quarter cup of oats in a blender or food processor and pulse until it becomes a powdery texture.
Then add one teaspoon of honey, two tablespoons of coconut oil, and a tablespoon of ground almonds.
Finally, add some aloe vera gel for an extra moisture boost – this will help keep your skin hydrated while using the night face cream.
Pulse everything together until combined into a creamy paste-like consistency.
You’re now ready to apply your homemade facial cream – enjoy!
Applying And Storing
Now that you’ve got your night face cream all mixed up let’s go over the best way to apply it and store it.
To apply the cream, just use your fingertips or a cotton pad and spread it gently onto clean skin in circular motions – this will help ensure even coverage. Make sure not to pull on the delicate skin around the eyes! Once applied, allow for several minutes of absorption before getting dressed.
When it comes to storage, keep the cream in an air-tight container away from any moisture or heat sources like direct sunlight or humidity. You can also make a double boiler if needed – this is great for creating additional batches of your homemade product without buying extra materials.
Finally, don’t forget to print out some labels with instructions so that you know exactly what ingredients are being used and how long they’ll last!
Crafting Bath Bombs
When crafting bath bombs, one of the most important things to consider is the ingredients and tools you’ll need. You’ll want baking soda, citric acid, essential oils on hand, molds, and a mixing bowl. When it comes to colors and scents, the possibilities are endless! You can experiment with different combinations to create unique looks and aromas. Finally, when it comes to shapes and designs, you can get creative and make everything from spheres to stars to hearts.
Ingredients & Tools
When it comes to crafting your own bath bombs, there are a few ingredients and tools you’ll need.
To get started, you’ll need baking soda, citric acid, Epsom salts, and witch hazel for the base of the bomb; then add in essential oils or fragrance oils for scent, as well as food coloring for color.
You’ll also want oil like coconut oil to help keep the bath bomb from falling apart in water.
For tools, all you really need is a bowl and spoon to mix everything together, plus molds or an ice cube tray to shape them with.
And don’t forget to give yourself plenty of time – these treatments can take up to 30 minutes each!
With these items ready to go, you can make your own homemade bath bombs right at home.
Colors & Scents
When making your own bath bombs, you’ll also want to consider the type of colors and scents you’d like.
Lactic acid can be used for a more vibrant color, while cocoa powder can be added for a richer scent.
You could even use essential or fragrance oils to create unique aromas tailored just for you.
With these additions, you’re guaranteed an amazing bathing experience every time!
Plus, they make great gifts, too – just wrap them up nicely, and voila!
Shapes & Designs
When crafting bath bombs, your chosen shapes and designs can take your experience up a notch.
Get creative by using molds or even eye makeup sponges for unique patterns and textures.
You could also use contour powder or glitter for added flair!
With these tips, you’ll have an amazing bathing session every time – no matter your design.
Making A Foam Bath
Let’s start by talking about the ingredients you’ll need to make your foam bath, and then we’ll move on to the preparation process. I’ll walk you through it step-by-step, so don’t worry if you feel overwhelmed!
Ingredients
The ingredients are key if you’re interested in making a foam bath!
Start with some aloe vera gel – it moisturizes and calms skin.
Next, add some coconut oil for extra nourishing benefits.
Not only will your skin thank you, but you’ll also love how luxurious this combination makes your bath feel!
So why not give it a try?
You may be surprised at how easy and enjoyable homemade cosmetics can be.
Preparation
Now that you have all the ingredients, it’s time to get started on your foam bath!
Before you begin, gather some water – this is an essential step for creating any homemade beauty product.
Once everything is ready, mix the aloe vera gel and coconut oil until they form a smooth paste-like consistency.
Finally, add warm water slowly while stirring gently with a spoon or whisk – this will cause bubbles to form as you stir and create a lovely foamy texture.
Now your homemade foam bath is ready to be enjoyed!
Making A Body Scrub
When making body scrubs at home, it’s important to have the right ingredients. I’ll go over the best ones to use and some tips to get the most out of your homemade cosmetics.
Ingredients For Homemade Body Scrub
Are you looking to make your own body scrub in the comfort of your kitchen? Making a body scrub is easy and fun; you can customize it according to your needs!
All you need are some raw sugar, oil, and maybe an essential oil! Raw sugar granules act as natural exfoliants that gently remove dead skin cells. The oil helps bind everything together while nourishing the skin. You can use any oil, like coconut, avocado, or sweet almond oil, for this purpose.
Finally, if desired, adding a few drops of essential oils gives them an extra boost of aromatherapy benefits. Let’s get started with making our own homemade body scrub – let’s have some fun!
Tips For Making Body Scrub
Now that you know what ingredients to use in your body scrub and how to put them together, let’s move on to some tips for making it even better!
First, add a tablespoon of shea butter if you want a more moisturizing scrub. This will help keep the skin hydrated while providing nourishment.
You can also switch out the raw sugar granules with white sugar crystals, which are finer and gentler on the skin.
Finally, don’t forget to give your scrub an extra aroma boost by using scented essential oils like lavender or rosemary oil.
With these simple yet effective tips, you’ll surely have beautifully soft and smooth skin in no time!
Creating A Lip Balm
Let’s start by discussing the ingredients you’ll need for your lip balm; we have many options. Then, we can move on to recipes; I have some great ones to share! Finally, let’s talk packaging; I’m sure you’ll find something perfect for your lip balm.
Choosing Ingredients
When creating a homemade lip balm, choosing the right ingredients is essential.
For a glossy finish, try using beeswax and honey as primary ingredients.
Beeswax helps create a protective barrier on the lips, keeping them moisturized and preventing water loss.
Honey is known for its antioxidants which help soothe dry skin and lock in moisture, making lips appear soft and supple.
Pick up some food-grade plant oils, such as coconut or almond, for their hydrating properties, too – these will keep your lips nourished all day!
With some simple ingredients, you can make an effective lip gloss that’ll last you weeks – now that’s something worth trying out!
Lip Balm Recipes
Now that you know what ingredients to use, it’s time to create your own lip balm recipes!
Start by melting down the beeswax and organic honey in a double boiler until they are both liquid. Once that is done, add other ingredients such as coconut or almond oil – make sure not to go overboard with these, as too much can dry on the lips.
Finally, pour your mixture into small containers and let them cool for at least an hour before using.
Voila – now you’ve got yourself some homemade lip balms!
Lip Balm Packaging
Now that you’ve made your lip balms, the next step is to package them!
You’ll need some containers for storing your creations and cosmetic labels for labeling each container.
There are many options out there for packaging, so make sure to pick something that fits both your needs and aesthetic preferences.
Using materials with a good seal is important so your lip balm doesn’t leak or dry out.
Also, choose labels that won’t fade over time to ensure people can identify the product they’ve used for years.
With all these things in mind, you’ll be ready to show off your homemade lip balms in style!
Crafting A Red Lip Balm
Let’s start crafting a red lip balm – first, we’ll talk about the ingredients you’ll need, then we’ll go over the preparation process. Grab your supplies, and let’s get going!
Ingredients
When it comes to crafting a DIY red lip balm, you want ingredients that are not only easy to find but also effective in giving you the result you desire!
I recommend coconut oil and honey as both have natural healing properties that can nourish your lips. Coconut oil is known for its moisturizing benefits, while honey’s antibacterial qualities can help protect against bacteria-related skin issues like acne or cold sores.
They’re incredibly affordable, so anyone can make these easy homemade cosmetics at home without breaking the bank.
All you need to do now is mix these two simple ingredients and prepare for smooth, kissable lips!
Preparation
Now that you’ve got the ingredients for your lip balm, it’s time to get ready for preparation!
Before starting any DIY beauty product or hair mask, ensure all your tools are clean and sanitized to avoid introducing bacteria into the mixture.
You can use rubbing alcohol or other disinfectants on them, such as cotton balls dipped in vinegar.
Once everything is ready, take out a small bowl and spoon, then measure equal parts of coconut oil and honey.
Mix these together until they become one uniform texture before pouring them into an empty container with a lid.
Now you’re set to enjoy soft lips throughout the day!
Crafting A Body Oil
Let’s start by making the base for the body oil – it’s really easy, and you can do it in your own kitchen! Next, we’ll add some essential oils to give it a nice scent.
Making The Base
Making your own body oil is a great way to save money and have fun in the kitchen! You’ll need to make a base for the oil to get started.
This can be done by combining ingredients like honey and cocoa powder with some natural oils like jojoba or olive. Combining these ingredients will help create an emulsion that will nourish your skin while keeping it hydrated.
All you need to do is mix them until they form a smooth paste and then add warm water to thin out the mixture. Once your base is ready, all that’s left is adding other essential oils according to personal preference – so go ahead, explore, and experiment!
Adding Essential Oils
Once you have your base ready, it’s time to add the essential oils.
You’ll want to start with organic extra-virgin olive oil as a carrier for your chosen essential oils. This will provide an effective and safe way to apply them directly onto the skin.
Always use therapeutic-grade essential oils when making body products, as they are more concentrated than regular ones and much more potent.
Choose from different types of aromatherapy scents like lavender, sandalwood, rosemary, or eucalyptus, depending on what scent or effect you’re looking for – just remember that a little goes a long way!
Once you’ve added all the desired essential oils into the mix, give it another stir, and you’re done!
Your very own custom body oil is now complete – enjoy!
Making A Gold Body Oil
First, discuss the ingredients needed to make a Gold Body Oil. Then, we’ll walk through how to put it all together.
Ingredients
Creating a luxurious and indulgent gold body oil at home is surprisingly easy!
All you need is 3 simple ingredients to make this special beauty product: aloe vera juice, coconut oil, and essential oils.
Aloe vera will add hydration and nourishment to the skin while soothing it from irritation and inflammation.
Coconut oil can be an effective moisturizer, ensuring your skin stays soft and supple all day.
Finally, adding some essential oils – like lavender or ylang-ylang – gives you a unique scent that will stay with you throughout the day.
So don’t be scared to experiment in your kitchen – the results may be better than expected!
Method
Now that you know the ingredients to make your luxurious gold body oil, let’s discuss how to create it.
Depending on your skin type, you can adjust the quantities for each ingredient – just remember that one tablespoon of honey is enough for most people.
Mix the coconut oil with aloe vera juice in a bowl, then add 2-3 drops of essential oils, depending on their strength.
Mix everything together until combined, and voilà! Your very own gold body oil is ready to be used.
Enjoy its nourishing benefits with every application!
Crafting A Body Butter
Let’s start by discussing the ingredients for this body butter. Then, we’ll move on to the preparation process.
Ingredients
When crafting a body butter, choosing the right ingredients is important. Look for fatty acids such as coconut oil that will help give your skin an extra boost of moisture and hydration.
Coconut oil is great because it also contains essential vitamins and nutrients, which can nourish the skin while keeping it soft and supple. Plus, you can find it relatively cheaply in most grocery stores or online retailers!
With all these benefits, coconut oil should be your go-to when making homemade body butter. So get creative – mix up some oils to make something unique that suits your skincare needs perfectly!
Preparation
Now that you’ve chosen your ingredients, it’s time to start preparing the body butter.
A simple way to do this is by combining coconut oil and other oils with a base like a coconut milk or almond oil. This combination will create a creamy consistency while providing essential fatty acids and moisture to keep skin healthy and soft.
Stirring everything together shouldn’t take too much time either – just make sure you mix well until all ingredients are completely blended!
With these simple steps, you can make amazing homemade body butter quickly.
Let’s get started!
Conclusion
Making cosmetics is a great way to save money and pamper yourself with luxury DIY products. Crafting homemade cosmetics in your kitchen can be easy, enjoyable, and budget-friendly.
With just a few simple ingredients from the pantry and bathroom cabinet, you can make amazing bath salts, face masks, serums, lip balms, body oils, and even body butter! Once you become comfortable working with these basic recipes for homemade cosmetics, you’ll find that creating unique blends of herbs and natural oils is an art form.
You may not have known it before starting this project, but now you know: when it comes to making luxurious beauty treatments at home – there’s never a limit to what you can create! So go on – get creative! Add personalized combinations of essential oils and clays; experiment with different scents and textures; play around with coloring agents like activated charcoal or gold mica powder.
The possibilities are endless! As they say, ‘The sky’s the limit!’ So let your imagination soar as you craft beautiful homemade cosmetics in your kitchen.