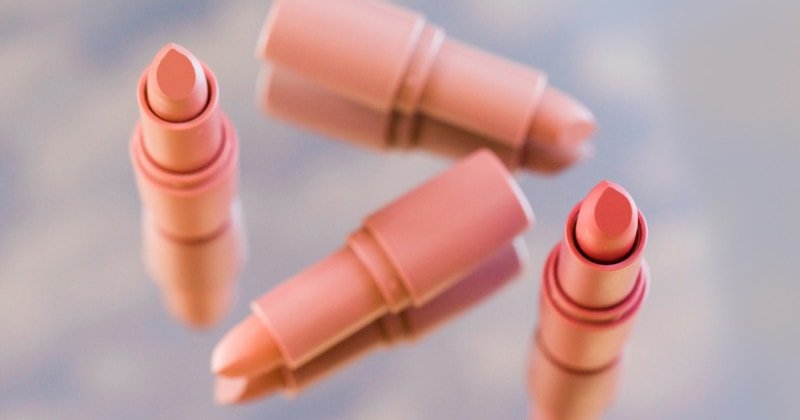
Ah, the beauty of natural lipstick. It’s a timeless look that never goes out of style and can always add some subtle glamour to your makeup routine. Making it yourself can be an incredibly rewarding experience – what could be more satisfying than crafting something so lovely with your own hands?
In this article, I’ll share my top tips on how you can easily create beautiful homemade lipsticks in no time! I’m sure many of us have wished for a simple way to make custom-made lip colors without buying expensive products from the store.
Well, fear not – with these easy steps, you can whip up gorgeous shades of lipstick from only natural ingredients in the comfort of your home. So let’s get started!
Chemical Ingredients In Store-Bought Lipsticks
Making your own natural lipstick is a great way to avoid the harmful chemicals and synthetic ingredients in store-bought lipsticks. Let’s look at what ingredients are typically used in commercial lipsticks and why you should consider making your own!
Most store-bought lipsticks come in metal tubes or plastic bullet containers, with many brands offering variations such as balms, liquid lipsticks, and jelly formulas. Generally speaking, these contain petroleum derivatives like mineral oil and petrolatum, which act as fillers to give them their creamy texture. Additionally, they often include artificial coloring agents, preservatives, fragrances, parabens, waxes, and lanolin – all of which have been linked to potential health risks.
By creating our own homemade version using natural ingredients, we can ensure better quality control over what goes into our cosmetics!
Long-Term Health Effects Of Store Bought Lipsticks
Regarding long-term health effects, natural lipsticks are the clear winner. Without all the chemicals and synthetic fragrances in store-bought lipsticks, you can be confident that your lips won’t suffer any adverse reactions.
Natural lipstick is often made with shea butter, beeswax, and nourishing vitamins that moisturize and protect your skin from environmental damage. Plus, many of these products come without a strong scent or flavor for those without added fragrances.
Here’s why else natural lipsticks are good for your lips:
- They use fewer preservatives than conventional brands
- Their smooth texture makes them more comfortable to wear throughout the day
- They’re loaded with essential oils and butter that help keep your lips soft and hydrated
There’s no denying that natural lipstick looks great and helps maintain healthy-looking lips over time. So if you want beautiful color while avoiding harmful ingredients, opt for a natural brand!
Potential Skin Irritation From Store-Bought Lipsticks
Now that we’ve discussed the long-term health effects of store-bought lipsticks let’s look at another important factor: potential skin irritation from these products.
Finding the right lipstick formula could be hard without risking an adverse reaction for those with sensitive skin or existing skin conditions. That’s why many people turn to homemade alternatives made with all-natural ingredients.
Homemade products don’t contain nasty chemicals or irritants, and they’re often much cheaper than their store-bought counterparts! Plus, you can make them in whatever color suits your fancy – perfect for creating your unique shade of natural lipstick.
With just a few simple steps, anyone can craft the perfect pout without worrying about what’s going into their body or on their lips.
Necessary Equipment For Making Homemade Lipsticks
Making your own natural lipstick from the comfort of your home is easier than you think! All you need are a few common kitchen items and some raw ingredients.
To get started, you’ll want to assemble all the necessary equipment for making homemade lipsticks:
- Heat source: A stove or hot plate will do – just make sure it’s clean before use.
- Water: Once heated up, use distilled water to avoid any impurities that could alter the outcome of your lipstick.
- Teaspoon beeswax: This gives the lipstick its texture and staying power when applied to lips.
- Glass bowl: You’ll need this as a vessel to mix everything together.
- Double boiler: Use one if available; alternatively, fill a pot with an inch of water and place a glass bowl on top (as long as it fits).
Once you have these items, you’re free to experiment with different combinations and color palettes until you find the perfect shade for yourself!
Make sure to note down each ingredient so that next time around, you can recreate exactly the same shade without too much hassle.

Accurate Measurements For Homemade Lipsticks
Now that you have all the equipment for making homemade lipsticks, it’s time to move on to accurate measurements. It is important to keep these measurements precise to ensure the properties of your finished lipstick are up to par.
Generally speaking, one teaspoon of wax, three teaspoons of carrier oil, and 10-15 drops of essential oils should be used. If you want a more luxurious feel, add cocoa butter – just 1/4 teaspoon will do!
Once you’ve added all the ingredients into a bowl or jar, mix them until they form an even mixture. This mixture can then be poured into molds and left to cool overnight before being removed and stored away safely.
Be sure not to overheat the mixture while mixing, as this can cause undesirable texture and consistency changes. With these guidelines followed closely, your homemade lipsticks should come out perfect every time!
Essential For Creating The Perfect Lipstick Formula
Creating the perfect lipstick formula for natural ingredients is about experimenting and tweaking recipes to get the right mix of colorants, balms, and other goodies.
Cocoa powder can be an effective darkening agent in your lipstick recipes, giving you a subtle but noticeable hue. To achieve this effect without synthetic additives like FD&C colors or artificial dyes, cocoa powder combined with a blend of oils like avocado and castor oil will provide a lusciously moisturizing base that adds richness and depth to your lipsticks.
When using natural ingredients, it’s important to remember that not all components have the same properties – some may naturally create more intense shades than others, so if you’re looking for something softer, tweak the ratio of balm to pigment until you find what works best for your needs.
Additionally, because these are natural products, they tend to expire sooner than their synthetic counterparts, so keep track of when they need replacing!
Mixing And Blending Lipstick Ingredients
Creating the perfect lipstick formula requires various tools, ingredients, and supplies. To achieve an ideal outcome and bring your vision to life, it is crucial to master the art of mixing and blending different products.
To get started on creating natural lipstick:
- Begin by gathering all necessary ingredients, such as cocoa butter, beeswax pellets, one teaspoon of coconut oil, and cosmetic grade colorant for adding pigment.
- Melt down these ingredients in a double boiler or microwavable container until completely liquified.
- Once melted, carefully pour into a pre-prepared silicone lipstick mold and let sit at room temperature until solidified.
- When ready, remove from the mold, package in eco-friendly materials such as recyclable paperboard tubes with tight caps, and enjoy!
With this method, you can craft any type of makeup product – be it glossy lip balm or matte lipstick – that’s safe and looks great too! By following these steps, you’ll have no problem creating beautiful shades of natural lipsticks that will make heads turn wherever you go.
Mixing And Scraping Lipstick Formula
Making your own natural lipstick at home is both fun and rewarding! It’s easy to start, as you’ll only need basic ingredients like coconut oil, lavender essential oils, food coloring, and empty lipstick containers.
Mix a tablespoon of coconut oil in a double boiler on medium heat until it becomes liquid to start mixing the formula for your DIY lipstick. Once it has melted completely, add 1 drop of lavender essential oil for scent and stir. Then add 5 drops of food coloring to the mixture and stir again.
Finally, pour the mixture into the container of your choice and let it cool before using. With these simple steps, you can easily make all-natural lipsticks free from harsh chemicals or preservatives – perfect for those who want to practice more sustainable beauty habits!
Measuring Ingredients Precisely For Homemade Lipsticks
After mixing and scraping the lipstick formula, it’s time to get precise with your measurements. If you want a successful batch of homemade lipsticks, measuring each ingredient is key!
Start by adding 1 teaspoon of beetroot powder for color, then add 1 teaspoon of coconut oil and 1 teaspoon of olive oil for moisture. Both oils should be melted down if they are not liquid before being added to the mixture.
Additionally, knowledge of fragrance families can help you customize your unique scent. Experimenting with essential oils such as lavender and peppermint can lead to fun combinations.
Once all ingredients have been mixed, fill up small lip balm containers with about 2 teaspoons of the mixture. Be sure to label them so you remember what scent combination you created!
Checking the Temperature Of Lipstick Ingredients
Do you ever wonder why your homemade lipstick looks so different from store-bought ones? It could be due to temperature.
When mixing their ingredients, many natural lipsticks need precise temperatures to look and feel the same as those from makeup stores.
It can get tricky, but here are a few tips on how to check the temperature of your lipstick ingredients: use a thermometer or try holding the chemical, such as shea butter or vitamin E oil, against your skin first if it feels cool, then that’s good enough; also make sure not to overheat scent or silicone molds which are very delicate materials.
If handled correctly, these details will ensure that your lipstick is evenly blended and has an even texture!
Dispensing Lipstick Formula Into Molds
Now that the temperature of all ingredients is just right, it’s time to take your lipstick mixture and dispense it into the molds.
To do this, you’ll need a colored lipstick mold (available online) typically made from silicone or acrylic. Carefully spoon in the warm mix and fill each cavity until full.
The trick here is to make sure the mixture cools as quickly as possible, so place the filled molds in your refrigerator for 15 minutes before transferring them carefully onto some wax paper on a baking tray.
Once cooled, pop out the lipsticks from their molds, and they’re ready to use! You can even decorate them with some shea butter or alkanet root powder if desired – simply sprinkle over the top of each stick once removed from their molds.
With natural lipstick now created, you’ve taken one more step towards transforming yourself with DIY beauty products!
Safety Equipment For Lipstick Making
When making natural lipstick, safety is key. You’ll need the right equipment to ensure that your product and workspace are sterile.
A boiler is an essential tool for melting waxes and oils together and sterilizing any tools you use during production.
Lip balm tins are a great way to store your finished product; these usually come with lids and labels so you can easily track what’s inside each tin.
For measurements, consider using a glass jar or beaker when measuring out ingredients like beeswax and butter. For smaller amounts of liquid ingredients like plant extracts, a glass dropper can help ensure everything gets mixed into the blend properly.
Try to stick with natural products, such as essential oils, rather than synthetics which may not mix correctly with other ingredients.
By following these guidelines, you can create safe and effective natural lipsticks every time!
Natural Butter For Homemade Lipsticks
Making your very own homemade lipstick is easier than you think! Nothing is more satisfying and empowering than creating a beautiful, natural lipstick that perfectly fits your personal style. It all starts with selecting the right ingredients for making the perfect blend.
For those looking to make their own lip balm, shea butter and mango butter are two of the most popular naturally-sourced butter used in DIY cosmetics due to their high concentration of fatty acids, which help retain moisture on the lips. Combined, they create an incredibly smooth texture that will moisturize your pout while adding vibrant color and shine.
A few drops of lavender oil can also be added for additional healing properties or as an intoxicating fragrance.
Once you have obtained these necessary ingredients, the fun part comes: crafting your unique shade and customizing it based on your preferences. You can experiment with combinations by mixing various colors until you get what you’re looking for – no matter how creative or wild you want to be!
So don’t hesitate, grab yourself some supplies and start experimenting today!
Waxes Used In Homemade Lipsticks
When making your own homemade lipsticks, the types of waxes you use are incredibly important. You want a mix that’s going to give you a long-lasting color and also hydrate your lips at the same time.
Shea butter is great for this as it’s naturally nourishing, while beeswax helps keep the lipstick from melting away quickly. Alkanet root powder can provide red pigmentation – perfect for creating an all-natural red lip!
Using these natural ingredients means that you don’t have to worry about synthetic nasties in your makeup either; plus, there are many other benefits when using homemade beauty products, like keeping your lips super soft and hydrated.
If you’re looking to create gorgeous lip colors with some added TLC, then make sure to add shea butter, beeswax, and alkanet root powder to your DIY project.
Essential Oils In Homemade Lipsticks
When creating natural lipsticks, one of the most important ingredients you can use is essential oils.
Lavender essential oil is a great choice for homemade lipsticks as it has antibacterial properties that help keep your lips soft and healthy while providing a subtle fragrance.
Combine other essential oils in the same fragrance family with lavender oil to create an even more nourishing lipstick.
For example, adding chamomile or geranium essential oil will give your lipstick additional antioxidant benefits that help protect and soften hair follicles on your lips.
Not only do these oils provide added nutrients to your skin, but they also make your finished product smell amazing!
By combining these powerful essential oils, you can achieve beautiful results when making homemade lipsticks without relying on artificial fragrances or preservatives.
Natural Pigments For Homemade Lipsticks
When making your own natural lipstick, you need the right ingredients. One of the most important components is a natural colorant that will give your homemade lip product an extra pop!
Beetroot powder is an excellent choice, as it provides a vibrant pink hue and contains antioxidants like vitamin C and manganese. You can also use other organic powders like eye shadows or tree mica.
For added depth and spice, consider adding in some cinnamon! This spicy flavor adds complexity to any shade and helps to nourish lips with its anti-inflammatory properties.
It might take some experimenting to find the perfect blend for your DIY lipstick, but you can create just about any look you desire with these natural pigments. They are safer than synthetic dyes and have unique benefits that make them worth exploring further.
So what are you waiting for? Start mixing up your favorite shades today!
Vitamin E Oil For Homemade Lipsticks
Vitamin E oil is a must-have for homemade lipsticks. It provides rich antioxidants and helps to nourish and protect the lips, promoting healthy hair growth.
Vitamin E oil also acts as an emollient, providing added hydration while keeping the lipstick’s color locked in place all day.
Add shea butter or other natural oils like coconut or avocado oil for extra protection and shine. These fats help to lock in moisture and make your lips feel smooth and silky.
Fragrance oils are optional but can add a hint of scent if desired—just remember not to go overboard with them!
These combined ingredients will give you a beautiful, moisturizing lipstick that looks great on any skin tone.
Preparing Your Workstation For Homemade Lipstick Making
Making natural lipstick at home is a fun and rewarding experience. But before you get started, it’s important to prepare your workstation properly to ensure that everything runs smoothly during the process.
Here are some of the best tips for setting up your workspace:
- Position heat sources strategically around you so that they’re easily accessible as needed during application – this could mean having multiple medium-heat sources like candles or hot water baths nearby.
- Organize all materials in advance – gather any lipsticks, oils, dyes, etc., in one place so that you can quickly reach them when necessary without having to search through piles of ingredients.
- Take advantage of benefits such as using protective gloves while working with heated substances and wearing safety goggles if mixing ingredients may cause irritation.
Having a well-organized space is essential for creating beautiful homemade lipsticks; it will make the process faster and easier and will also be safer!
Melting The Lipstick Ingredients For Homemade Lipsticks
Making your own natural lipstick from scratch is a great way to create unique shades and customize the ingredients for your perfect product.
To get started, you’ll need to melt together some of your favorite lip-safe crayons with a carrier oil like jojoba or coconut to make a molten mixture that can be poured into an empty branded lipstick tube or paper towel mold.
The first step is to fill the pot with water and bring it to a boil on the stovetop. Then, put the waxes and oils into separate heat-resistant containers – such as glass jars – which will be placed inside the boiling water bath.
Using an oven mitt, carefully stir the contents until everything has melted completely. Allow it to cool slightly before pouring it into your chosen container for easy application, whether directly into a lipstick tube or onto a sheet of parchment paper lined with aluminum foil wrapped around it.
You can even use old chapstick containers if desired! With just these simple steps, you’ll have created beautiful homemade lipsticks that will impress any makeup lover!
Mixing The Lipstick Formula For Homemade Lipsticks
Creating your own lipstick is a beautiful, rewarding experience. For the best results, use fresh ingredients and carefully choose ingredients to avoid any unexpected allergic reactions.
You’ll need the following:
- A pinch of cinnamon
- Cinnamon powder
- Other lip-safe essential oils or colorants
Once you have all your materials gathered together, blend them in a bowl until they form a paste. If you’d like a creamier texture, add more oil; for a firmer formula, add some beeswax pellets.
From here, pour the mixture into molds and let it cool before wearing your new homemade creation! Be mindful that natural ingredients can spoil quickly, so only mix as much as you need and store leftovers safely away from moisture and heat.
With just a few simple steps, you can create bold colors with complete confidence knowing that you are avoiding any potential hazards associated with synthetic products.
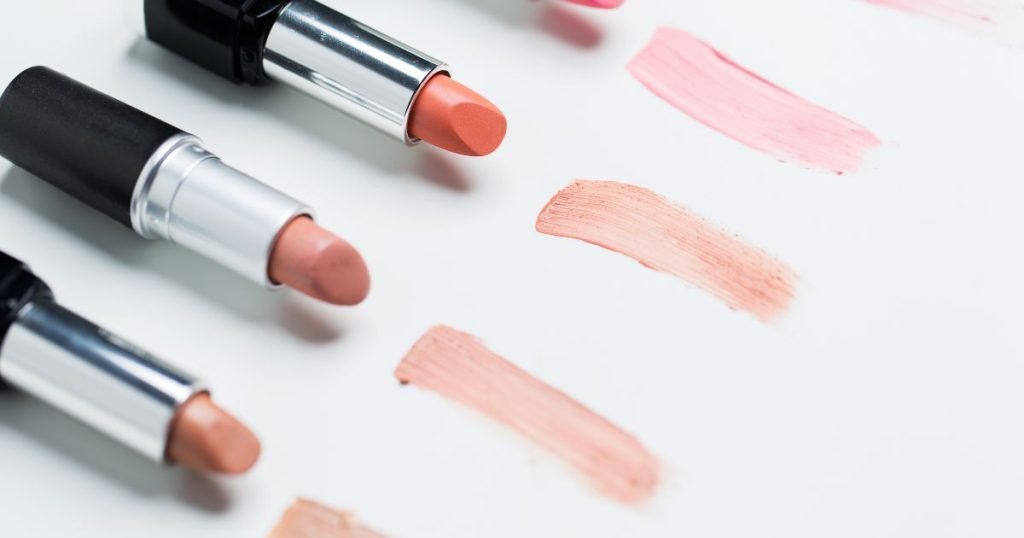
Adding Color To Homemade Lipsticks
Now that the formula for your homemade lipstick is complete, it’s time to get creative and add color.
You can use natural dyes like alkanet root powder or even pigments from commercial products.
Add 2 milligrams of product per teaspoon of shea butter and mix until you reach the desired shade.
To create a richer hue, continue adding more milligrams in 1-2 increments until you’re satisfied with the result.
Don’t forget to add some fragrance oils for scent!
This will be a great way to personalize your creations and make them stand out against mass-produced lipsticks.
This method allows you to experiment with various colors without buying expensive materials.
Plus, since you know exactly what ingredients are going into each batch, you don’t have to worry about potential toxins in commercial products.
Happy creating!
Adding Flavor To Homemade Lipsticks
Making your own lipstick is a fun, creative project that can save you money in the long run. Whether you’re looking for pink lipstick or fruity lip balm recipes, homemade natural lipsticks are a great choice and easy to make with just a few simple ingredients.
To start, all you need is a clean jar (a small mason jar works best) and your choice of base oils, such as olive or coconut oil. These will serve as the foundation for your homemade lemon lip balm recipe.
Then add beeswax and butter like cocoa butter and shea butter, which will give your finished product a creamy texture. Finally, some essential oils that lend flavor and fragrance to the concoction; experiment with different combinations until you find one that suits you!
You can even opt for all-natural flavors by adding fresh fruit juices or zest instead. So get creative, have fun, and don’t forget to enjoy wearing your freshly made natural lipstick afterward!

Pouring The Lipstick Formula Into Molds
Now that you’ve added a delicious flavor to your homemade lipsticks, it’s time to move on to the next step in creating these natural cosmetics.
Pouring the lipstick formula into molds is an important process, as it will determine how your finished product looks and feels.
When choosing the ingredients for your formula, choose the ones ideal for nourishing damaged skin cells. A teaspoon of shea butter can make your lip balm perfect – its fatty acids help protect lips from external irritants while giving them a smooth finish.
Don’t forget to add some essential oils, too; they’ll make sure that your color payoff is strong and give off a pleasant scent!
With all these components combined, you can pour your mixture into molds and wait until they harden before removing them.
Cooling And Setting Homemade Lipsticks
Making natural lipsticks is a fun and easy DIY project – all you need are a few key ingredients, some simple tools, and a bullet-style lipstick mold.
A basic homemade lipstick starts with organic beeswax or carnauba wax as the base, combined with moisturizing oils such as olive, almond, avocado, or coconut oil for deliciously soft lips.
To complete your lipstick creation add mica powder to create color and titanium dioxide to give it that perfect creamy texture.
Finally, if you’re looking for an even shinier finish, fill up your tubes of lip gloss balm!
But before we dive into our DIY makeover, let’s talk about the tools needed:
First, you’ll need a thermometer to monitor temperatures when melting down your waxes.
You also want heat-resistant glass containers to mix those luxurious oils and powders.
Last but not least, don’t forget to grab one of those amazing little bullet-style silicone lipstick molds – they make life much easier when making this kind of cosmetic from scratch!
So why wait? Get creative today and start making your own delicious homemade lipsticks!
Removing Homemade Lipsticks From Molds
Removing homemade lipsticks from molds can be as easy as slicing a lemon. All you need is some patience and the right technique.
After mixing together your ingredients, such as lemon balm lip balm, bullet-style lipstick, alkanet root powder, balanced fragrances, and concentration of fragrance oils, it’s time to pour them into silicone or plastic molds. Once they’ve set in the refrigerator for a few hours, carefully remove each piece with tweezers or a spoon. Be sure to use slow but steady pressure so that you don’t damage the shape of the lipstick!
If any pieces are stuck inside their molds after removal, gently press them against a warm surface like your skin or a flat surface until they loosen up and come out easily. You may also want to lightly dust them with cornstarch before storing them away—this will help keep them from sticking together and make it easier when applying later on.
With this knowledge in hand (or in lips), all that’s left is to enjoy your freshly made natural lipstick creations!
Conclusion
Making your own homemade, natural lipsticks is a rewarding experience you won’t forget. I can confidently say that the result will be much more satisfying than anything store-bought could offer.
You get to customize it however you want and have peace of mind knowing exactly what ingredients are going into the mix. Making lipsticks at home has been my saving grace when finding something healthy for my lips and skin.
It’s amazing to have total control over every aspect, from texture to flavor! Plus, you don’t need to worry about long-term health effects or potential irritation since all ingredients are natural.
If there was a time to experiment in your kitchen, now would be it! You’ll never know how easy and fun this project can be until you try it yourself. So grab some supplies from around the house and start creating your custom lipstick today!
Your point of view caught my eye and was very interesting. Thanks. I have a question for you.
Your point of view caught my eye and was very interesting. Thanks. I have a question for you.
Thanks for sharing. I read many of your blog posts, cool, your blog is very good.
Can you be more specific about the content of your article? After reading it, I still have some doubts. Hope you can help me.
Thanks for sharing. I read many of your blog posts, cool, your blog is very good.
Great post, I conceive website owners should acquire a lot from this website its really user genial.
This design is incredible! You most certainly know how to keep a reader amused. Between your wit and your videos, I was almost moved to start my own blog (well, almost…HaHa!) Wonderful job. I really enjoyed what you had to say, and more than that, how you presented it. Too cool!
Thank you for your sharing. I am worried that I lack creative ideas. It is your article that makes me full of hope. Thank you. But, I have a question, can you help me?
My husband and i felt really peaceful Edward could finish up his preliminary research out of the ideas he had from your site. It is now and again perplexing just to continually be giving out procedures the others could have been selling. And we see we need the writer to be grateful to because of that. These explanations you have made, the simple site navigation, the friendships you can assist to instill – it’s everything wonderful, and it is leading our son and the family reason why this topic is interesting, and that’s extraordinarily mandatory. Thanks for the whole thing!
We’re a gaggle of volunteers and opening a brand new scheme in our community. Your web site offered us with useful info to work on. You have done a formidable task and our whole group might be thankful to you.
I do love the way you have framed this specific challenge plus it really does provide me some fodder for thought. However, coming from what precisely I have personally seen, I basically trust when the opinions stack on that people remain on point and in no way embark upon a tirade involving the news of the day. Yet, thank you for this outstanding point and although I can not concur with this in totality, I respect the point of view.
Yay google is my king helped me to find this outstanding site! .
Your article helped me a lot, is there any more related content? Thanks!
I don’t think the title of your article matches the content lol. Just kidding, mainly because I had some doubts after reading the article.
I love your blog.. very nice colors & theme. Did you create this website yourself? Plz reply back as I’m looking to create my own blog and would like to know wheere u got this from. thanks
I don’t think the title of your enticle matches the content lol. Just kidding, mainly because I had some doubts after reading the enticle.
Your article helped me a lot, is there any more related content? Thanks! https://www.binance.com/ro/register?ref=V3MG69RO
Your point of view caught my eye and was very interesting. Thanks. I have a question for you.
I don’t think the title of your article matches the content lol. Just kidding, mainly because I had some doubts after reading the article.
Thanks , I have just been looking for info about this topic for ages and yours is the greatest I have discovered so far. But, what about the bottom line? Are you sure about the source?
Thanks for sharing. I read many of your blog posts, cool, your blog is very good.
It is in reality a nice and helpful piece of information. I am glad that you shared this helpful info with us. Please stay us up to date like this. Thank you for sharing.
Tuklasin ang mga nangungunang online casino na may ranggo para sa 2025. Ihambing ang mga bonus, pagpipilian ng laro, at pagiging mapagkakatiwalaan ng mga nangungunang platform para sa ligtas at kapaki-pakinabang na paglalarobonus sa casino
I don’t think the title of your article matches the content lol. Just kidding, mainly because I had some doubts after reading the article.
There is noticeably a bundle to know about this. I assume you made certain nice points in features also.
Thank you for your sharing. I am worried that I lack creative ideas. It is your article that makes me full of hope. Thank you. But, I have a question, can you help me?
Thank you for your sharing. I am worried that I lack creative ideas. It is your article that makes me full of hope. Thank you. But, I have a question, can you help me?
Thanks for sharing. I read many of your blog posts, cool, your blog is very good.
I really delighted to find this website on bing, just what I was searching for : D too saved to my bookmarks.
Incredible! This blog looks exactly like my old one! It’s on a completely different topic but it has pretty much the same page layout and design. Excellent choice of colors!
You actually make it seem really easy along with your presentation but I find this topic to be actually one thing which I think I’d by no means understand. It sort of feels too complicated and very vast for me. I’m having a look forward for your subsequent put up, I?¦ll try to get the cling of it!
Your article helped me a lot, is there any more related content? Thanks!
Hello There. I found your weblog the usage of msn. This is a really smartly written article. I will be sure to bookmark it and come back to read more of your helpful info. Thanks for the post. I will definitely return.
Your article helped me a lot, is there any more related content? Thanks!
Thank you for your sharing. I am worried that I lack creative ideas. It is your article that makes me full of hope. Thank you. But, I have a question, can you help me?
I don’t think the title of your article matches the content lol. Just kidding, mainly because I had some doubts after reading the article. https://www.binance.info/lv/register?ref=B4EPR6J0
Your point of view caught my eye and was very interesting. Thanks. I have a question for you. https://accounts.binance.info/en-IN/register?ref=UM6SMJM3
very nice submit, i actually love this website, carry on it
Your point of view caught my eye and was very interesting. Thanks. I have a question for you.
Can you be more specific about the content of your article? After reading it, I still have some doubts. Hope you can help me.
303751 244945Quite excellent data can be located on weblog . 499843
226428 442883Wow, superb blog structure! How long have you been running a blog for? 838053
Thank you for your sharing. I am worried that I lack creative ideas. It is your article that makes me full of hope. Thank you. But, I have a question, can you help me?
I was looking through some of your content on this site and I think this website is rattling instructive! Keep on posting.
221477 608419Hi! Do you know if they make any plugins to safeguard against hackers? Im kinda paranoid about losing everything Ive worked hard on. Any ideas? 333770
Your article helped me a lot, is there any more related content? Thanks!
Your point of view caught my eye and was very interesting. Thanks. I have a question for you.
Your point of view caught my eye and was very interesting. Thanks. I have a question for you.
Thank you for your sharing. I am worried that I lack creative ideas. It is your article that makes me full of hope. Thank you. But, I have a question, can you help me?
Thanks for sharing. I read many of your blog posts, cool, your blog is very good.
Definitely believe that which you said. Your favorite justification appeared to be on the web the simplest thing to be aware of. I say to you, I definitely get irked while people consider worries that they just don’t know about. You managed to hit the nail upon the top and also defined out the whole thing without having side effect , people could take a signal. Will probably be back to get more. Thanks
I wanted to thank you for this great read!! I definitely enjoying every little bit of it I have you bookmarked to check out new stuff you post…
I don’t think the title of your article matches the content lol. Just kidding, mainly because I had some doubts after reading the article.
I do agree with all the ideas you’ve presented to your post. They are very convincing and will definitely work. Nonetheless, the posts are too short for novices. May you please lengthen them a little from next time? Thank you for the post.
I like this web blog very much, Its a real nice situation to read and obtain info . “What happens to the hole when the cheese is gone” by Bertolt Brecht.
Thank you for your sharing. I am worried that I lack creative ideas. It is your article that makes me full of hope. Thank you. But, I have a question, can you help me?
**backbiome**
backbiome is a naturally crafted, research-backed daily supplement formulated to gently relieve back tension and soothe sciatic discomfort.
**vivalis**
vivalis is a premium natural formula created to help men feel stronger, more energetic, and more confident every day.
**glycomute**
glycomute is a natural nutritional formula carefully created to nurture healthy blood sugar levels and support overall metabolic performance.
**balmorex**
balmorex is an exceptional solution for individuals who suffer from chronic joint pain and muscle aches.
Thanks for any other fantastic post. The place else may anybody get that type of info in such a perfect way of writing? I’ve a presentation subsequent week, and I am on the look for such info.
**aquasculpt**
aquasculpt is a revolutionary supplement crafted to aid weight management by naturally accelerating metabolism
**nervecalm**
nervecalm is a high-quality nutritional supplement crafted to promote nerve wellness, ease chronic discomfort, and boost everyday vitality.
**synadentix**
synadentix is a dental health supplement created to nourish and protect your teeth and gums with a targeted combination of natural ingredients
**prostavive**
prostavive Maintaining prostate health is crucial for mens overall wellness, especially as they grow older.
**alpha boost**
alpha boost for men, feeling strong, energized, and confident is closely tied to overall quality of life. However, with age, stress, and daily demands
**yusleep**
yusleep is a gentle, nano-enhanced nightly blend designed to help you drift off quickly, stay asleep longer, and wake feeling clear
**prodentim**
prodentim is a distinctive oral-care formula that pairs targeted probiotics with plant-based ingredients to encourage strong teeth
**gl pro**
glpro is a natural dietary supplement designed to promote balanced blood sugar levels and curb sugar cravings.
**mindvault**
mindvault is a premium cognitive support formula created for adults 45+.
**nitric boost ultra**
nitric boost is a daily wellness blend formulated to elevate vitality and support overall performance.
**femipro**
femipro is a dietary supplement developed as a natural remedy for women facing bladder control issues and seeking to improve their urinary health.
**vertiaid**
vertiaid is a high-quality, natural formula created to support stable balance, enhance mental sharpness, and alleviate feelings of dizziness
**vitrafoxin**
vitrafoxin is a premium brain enhancement formula crafted with natural ingredients to promote clear thinking, memory retention, and long-lasting mental energy.
**glucore**
glucore is a nutritional supplement that is given to patients daily to assist in maintaining healthy blood sugar and metabolic rates.
**sugarmute**
sugarmute is a science-guided nutritional supplement created to help maintain balanced blood sugar while supporting steady energy and mental clarity
**primebiome**
The natural cycle of skin cell renewal plays a vital role in maintaining a healthy and youthful appearance by shedding old cells and generating new ones.
**hepatoburn**
hepatoburn is a high-quality, plant-forward dietary blend created to nourish liver function, encourage a healthy metabolic rhythm, and support the bodys natural fat-processing pathways.
Can you be more specific about the content of your article? After reading it, I still have some doubts. Hope you can help me. https://accounts.binance.com/register-person?ref=IXBIAFVY
Your point of view caught my eye and was very interesting. Thanks. I have a question for you.
Your point of view caught my eye and was very interesting. Thanks. I have a question for you.
Your article helped me a lot, is there any more related content? Thanks!
Thanks for sharing. I read many of your blog posts, cool, your blog is very good. https://www.binance.com/register?ref=IXBIAFVY